Pages allow you to add additional content and information to your online store. The content on these pages can help your customers and website visitors learn more about your business and the products/services that you have to offer.
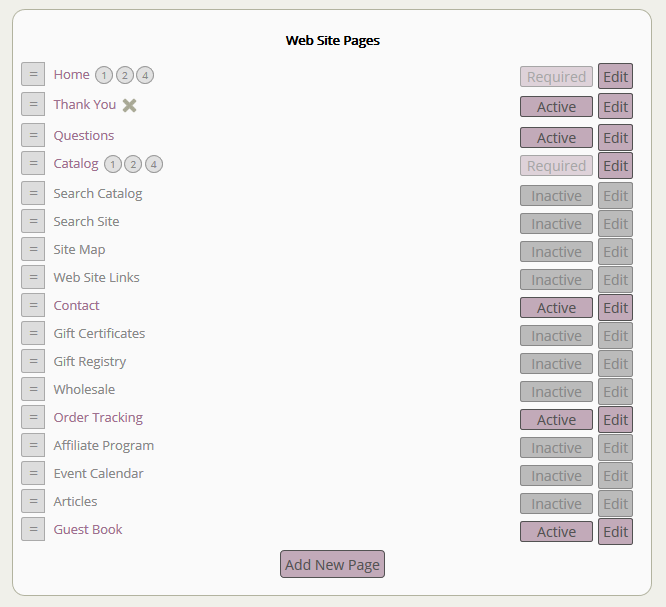
There are some pages that are already built into your store admin area. These are called built in pages and can not be deleted from your store builder, however all but the Home and Catalog pages can be deactivated easily from the area pictured below.
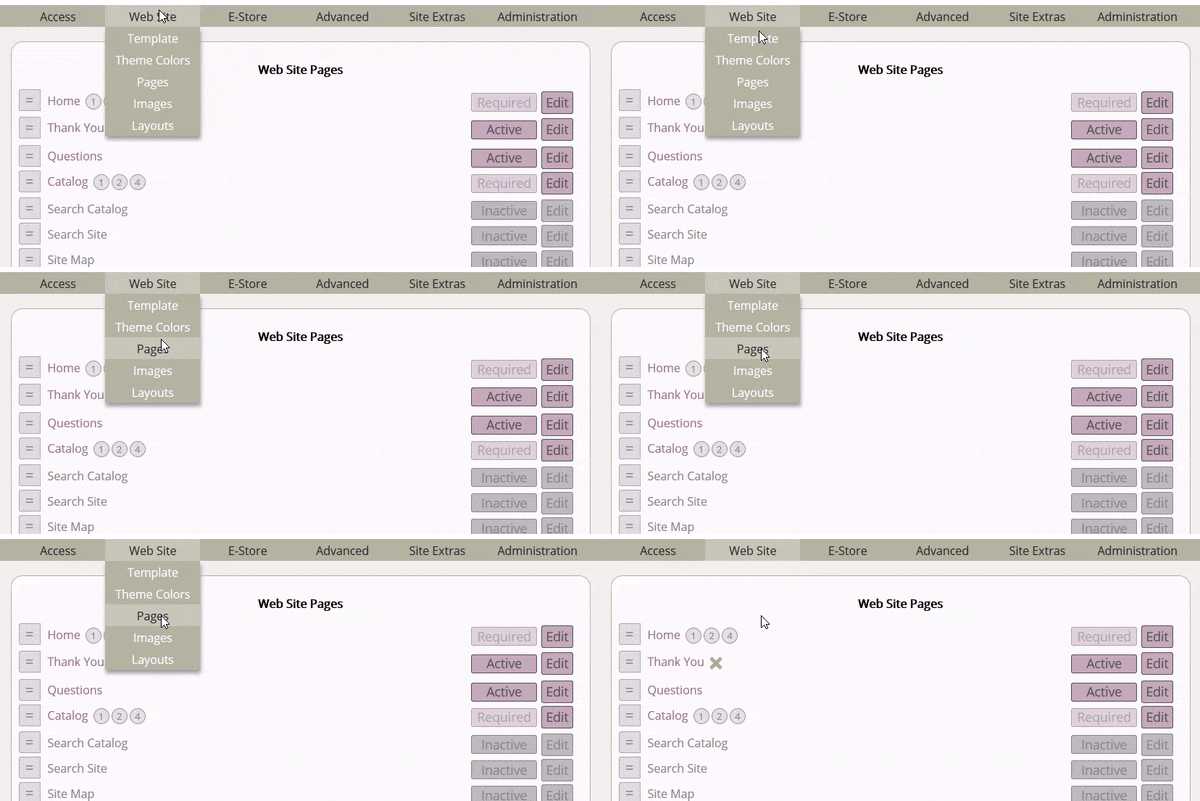
You can access this area of your store builder by navigating to Web Site > Pages.
To create a page on your store, you will first want to log into your store admin and navigate to the Web Site drop down and "Pages" link. Clicking on this link will take you to the "Pages" screen, where you can see the included pages and create your own. 
To add a new page to your store:
- Log into your store admin.
- Navigate to Web Site > Pages.
- Click on the "Add" button.
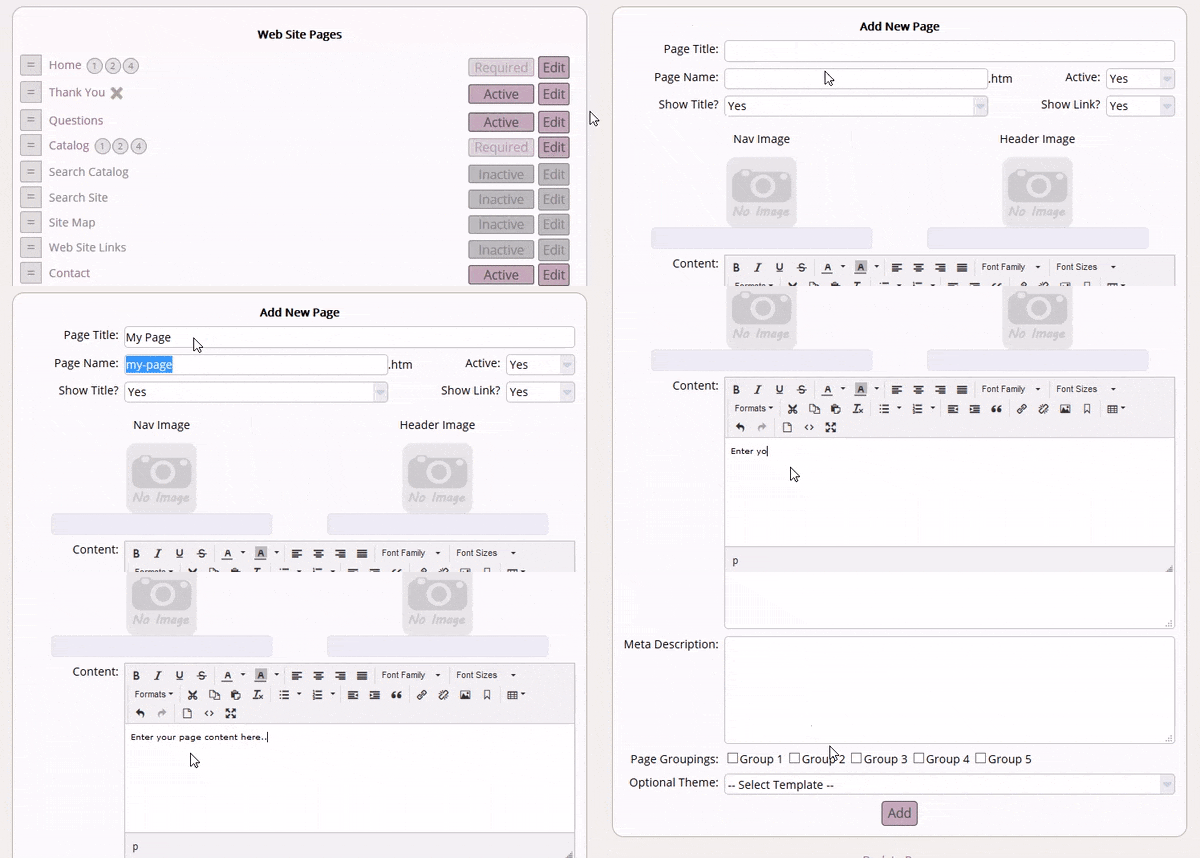
- Insert your page details (see video snippet below).
- Save your changes by clicking the "add page" button.
TIP: You can also delete pages, go back and edit your pages to make necessary changes, and reorder your categories from this screen!
To edit your page:
- Log into your store admin.
- Navigate to Web Site > Pages.
- Choose the page you'd like to edit from the list and click on the "edit" link.
- Make your changes.
- Save your changes by clicking the "update" button.
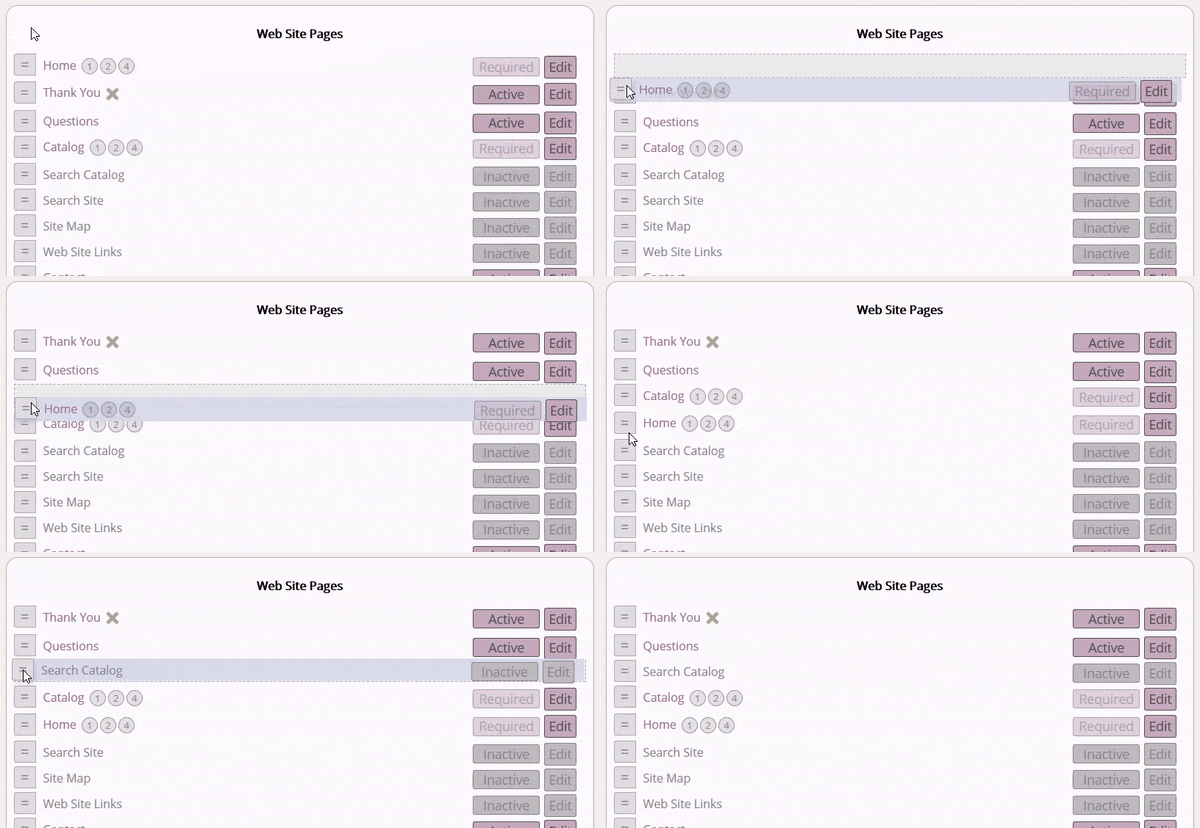
To reorder your pages: (this feature will reorder your website page order as well!)
- Log into your store admin.
- Navigate to Web Site > Pages.
- Choose the page you'd like to move up or down and click the small hamburger menu to grab and move. See video snippet below to view this activity in action!
- Your changes will be saved as they are made.

To delete a page:
- Log into your store admin.
- Navigate to Web Site > Pages.
- Notice that pages that can be deleted have a "X" next to them on your page list (see screengrab above).
- Click this "X" to delete the page.
- You will be prompted to confirm these changes on the next screen.
To activate or deactivate a page:
- Log into your store admin.
- Navigate to Web Site > Pages.
- Choose the page you'd like to activate or deactivate from the display and click the Active/Inactive button.

Page Title: Enter your page title. This will auto-populate to become your "Page Name" below, so be sure not to place any spaces or unnecessary characters.
Page Name: Your page URL. This can be edited. TIP: Keep best practices SEO in mind while creating!
Active: Should this page be active and available for viewing from your website?
Show Title: Would you like to display the page's title on your website?
Show Link: Would you like the link to show up on your website, or is this a "hidden" page that doesn't need a link to show? (ie: for the Thank You page, you would hide the link since this page should only be seen by customers that have be redirected back to your store)
Nav Image: The Nav Image will display (wherever your template has your page links set to show) as a graphic link instead of a text link.
Header Image: The Header Image will be showcased across the top of the page when your customer clicks to view that page on your website.
Content: This is where you will enter your page content to display on your website.
Keywords/Meta Title: These areas are for SEO. To read more about SEO, check out our All About SEO article!
Page Groupings: Learn more about page groupings or experiment by selecting different groups and saving to view the changes live on your website. Don't worry, they're just as easy to change back!
Optional Template: Allows you to choose another template from the default for this page. Usuaully this feature is used when you have multiple different template layouts installed and would like to switch between then for your catalog, product, and page content areas of the site.
If you have any questions about setting up a page, open a ticket and a member of our staff will be happy to assist you.
Last Updated: 04/13/2017

